Unless you’ve been under a rock like the guy in the Geico commercial,
then you have probably noticed that a lot of changes have been
happening on Facebook, particularly to the fan pages. Here is a look at
how you can take advantage of these changes and use them to market to
your targeted audience.
1. Using Facebook as a Fan Page
This is by far one of the most powerful changes, in my opinion, to
fan page functionality. Why? Before this change, there were only a few
ways to share your fan page with people who are not a fan of your brand
on Facebook. The first was by sharing the page directly with your
personal profile’s contacts. The second was by hoping that your page’s
fans would share it with their contacts. And the third was by spending
money with Facebook advertising.
Now, with the option to use Facebook as your page, you can do
something that reaches out to Facebook users in your targeted audience
for free. Here are easy steps on how to get your brand in front of a
larger Facebook audience.
How to Use Facebook as Your Page
You must be an admin of the page you want to market before going any
further – if you aren’t, then become a fan of the page and ask another
admin of the page to add you as administrator.
Step 1. When logged into your personal profile, go under the Account menu and select Use Facebook as Page.
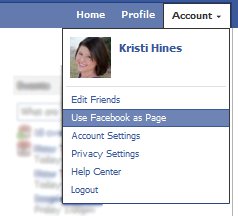
Step 2. Choose the page you want to participate as on Facebook and Switch.

Step 3. Find fan pages that have the same target audience as your brand and Like. For example, if you’re brand sells handmade dog collars online, then your target audience is probably also a fan of PetSmart, Petco, the Westminster Dog Show, and other similar pages.
Step 4. Start interacting on those pages just like you would
do with your personal profile in terms of liking and commenting on new
wall posts by the page or by the fans of the page. Instead of being
linked to your personal profile, your activity will be linked to your
fan page. This means if you provide useful, valuable comments, you will
be seen as an authority and fans of that page might become a fan of
yours as well.
Using Facebook as your fan page will help you get more exposure for
your brand’s Facebook page, leading to more likes and engagement with
your targeted audience.
2. Featured Likes
Speaking of Likes, did you know your fan page can now
display five favorite likes of its own? Southwest’s fan page is a great
example of using this feature to market related brands of subsidiaries
of your brand.
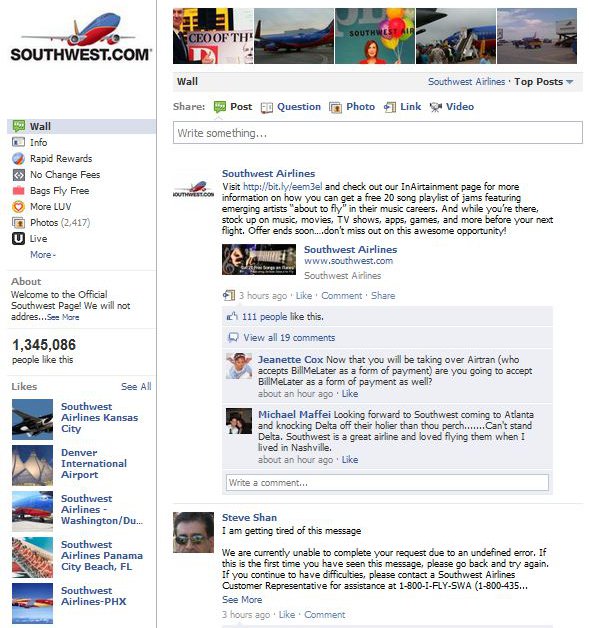
You can also feature the fan pages of your partners, and connect with
them in hopes that they will feature you on their page as well. Here’s
how to do it!
Setting Your Fan Page’s Featured Likes
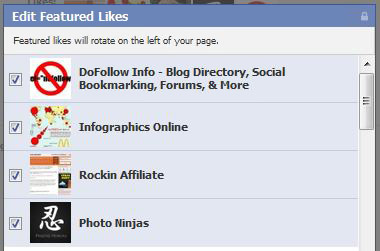
Step 1. Using Facebook as your fan page (as detailed in the previous section), be sure to like the pages you want to select as Featured Likes first.
Step 2. Go to your Facebook fan page and click the Edit Page button.
Step 3. Find the Featured settings and click on Edit Featured Likes.

Step 4. Check the box next to the five fan pages you want displayed in your Featured Likes section.
Unfortunately, there is not a way to see who has set your page as a
featured like yet. But as you can imagine, this feature will probably
lead to more likes from other fan pages, or likes for your subsidiary
pages from your main page.
3. Top Five Profile Photos
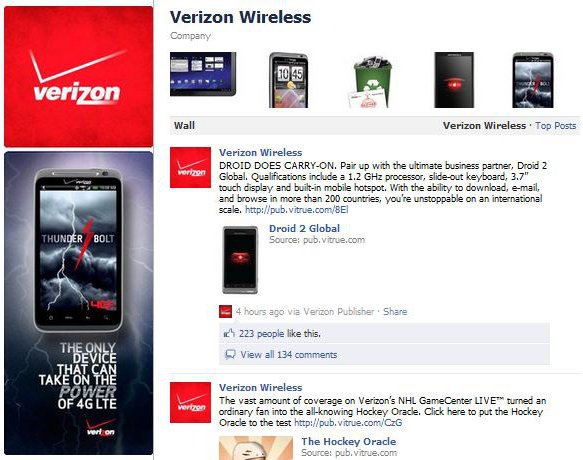
The new top strip of five profile photos is a great way to display
the best of your brand. It can be used in a variety of ways, such as:
- A vendor displaying their latest products.
- A corporation showing off the well-recognized faces of the brand.
- A freelancer giving a quick presentation of their latest designs.
Selecting the Top Five Photos
These top photos are automatically chosen from your fan page’s
default photo album. Here’s how to make sure the right images that best
represent your brand show up in the top five above your wall.
Step 1. Go to your Facebook fan page and click on Photos, then the Upload More Photos.
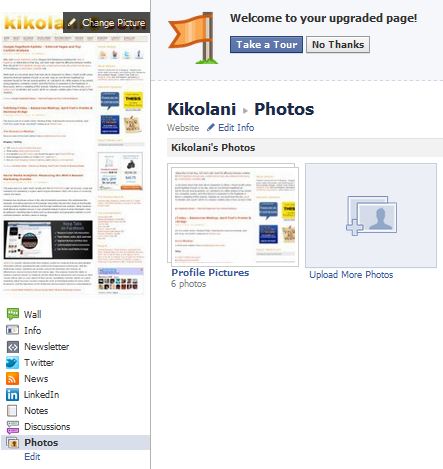
Step 2. Use the Select Photos button to upload photos from your computer to your profile.
Step 3. Create a new album for your uploads.
Step 4. After you enter details about your photos and either
publish them (or skip publishing them) to your wall, go to your page’s
wall. If you have more than five photos, you can choose which one will
be in the top five by simply hovering over unwanted photos and clicking
on the X to remove them.

One thing I should warn you about – you may not have full control
over your top five photos right now! If you allow people to tag your
Facebook fan page in photos, then the latest tagged images will show up
in this top five strip on your wall. You can either be vigilant and
keep an eye on new photos, removing them as they come along if
inappropriate. Alternatively, you can do the following.
Disable Fan Page Photo Tagging
Step 1. Go to your Facebook fan page and click the Edit Page button.
Step 2. Find the Apps, and click on the Go to App link under Photo
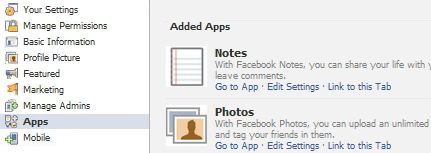
Step 3. Adjust your settings for allowing fans to post or tag photos for your page.
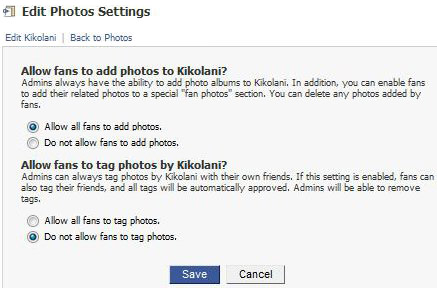
If you really want to get creative, you can use the tips in this post about using the Facebook photo viewer as a marketing tool and create a banner like advertisement out of your top five images.
4. Showing Page Owners
Another new option for Facebook fan pages is to show Featured Owners of the page, which shows up under the fan page’s Featured Likes.
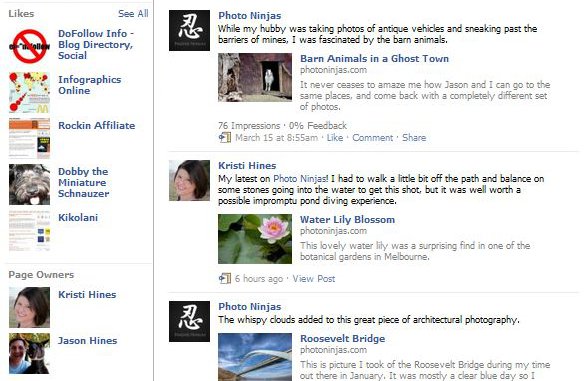
Some fan pages may want to keep the page owners / administrator
private, but a benefit of making them public in some cases would be if
one or more of the page owners would be more easily recognizable than
the page’s brand. For example, I usually don’t become a fan of any
random blog, but if I saw that it was a well-known blogger behind that
fan page, I might be more likely to become a fan.
Setting Featured Page Owners
The following steps will allow you to display your featured page owners.
Step 1. Go to your Facebook fan page and click the Edit Page button.
Step 2. Find the Featured settings and click on Edit Featured Page Owners.
Step 3. Check the box next to the page owners you want displayed, similar to what you do with the Featured Likes.
The one thing you should keep in mind is that this is essentially
linking the page owner’s personal profiles on the fan page. You will
want to be sure that each page owner agrees to having their personal
profile displayed prior to publicizing them as owners.
5. Getting in Your Fans News Feeds
While this isn’t as new as the other Facebook fan page changes, this
is something important that every page owner should know. People can be
a fan of your page and rarely see your page’s updates. This is due to
the fact that Facebook “prioritizes” a user’s news feed with the people /
pages they interact with the most. Therefore, if you want people to
see your fan page’s updates, you will need them to engage with your fan
page.
It’s almost like the thing with credit – you can’t get credit until
you build a good credit history, but you can’t build a good credit
history if you don’t have credit. So how do you encourage engagement
with your fan page if they possibly aren’t seeing it in their news feed?
Encouraging Fan Page Engagement
Here are three easy ways to build up audience engagement on your fan page.
Step 1. Post updates regularly. I would guess that most fan pages should update once a day, or at least a few times a week.
Step 2. Ask questions, or ask for opinions on something.
People love to answer questions, and this will definitely drum up
interactivity between your page and your fans.
Step 3. Cross promote your fan page activity across your other
networks. When you ask questions on your Facebook fan page, tweet the
question and link to the fan page (if the question is going to be the
top item for a while) or link directly to the status update with the
question itself. To grab the direct link to a status update, right
click on the timestamp for the update and copy the URL.
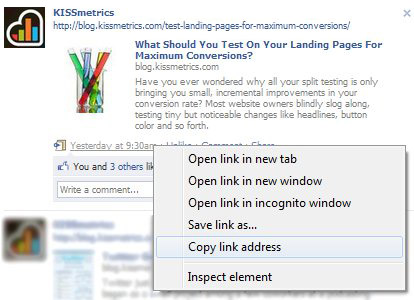
Step 4. Host regular “events” on your Facebook fan page and cross promote them. Social Media Examiner does a great job of this by having a regular Friday expert question and answer session.
6. Linking to a Fan Page from a Personal Profile
If your fan page’s brand has employees who are willing to promote
their employer, here is a way to get them to share the fan page with
their connections.

Adding a Fan Page as an Employer
Here are the steps to adding a fan page to a personal profile as an employer, like I have done with the fan page for Vertical Measures.
Step 1. Be sure you have liked the fan page with your personal profile first.
Step 2. Go to your personal profile, click on the Edit Profile link above your top five featured images and navigate to the Education and Work section.

Step 3. If you have your company in your list already, but it
isn’t linked to the company’s official fan page, then you will want to
click on the X link next to their listing and remove them first.
Step 4. Start typing in the name of your employer in the Where have you worked? box next to Employer.
If they appear in the dropdown, then click on their name, but if not,
just hit enter to add them. It will usually connect to the fan page if
you have liked them. Then continue to fill out your employee details
and click Add Job.
Step 5. Go to view your profile and confirm that it has added your employer’s fan page link to the top information.
You can also use this same approach to get the fan page of your
website or other favorite fan page listed at the top of your personal
profile, using the “position” of blogger, owner, founder, photographer,
etc. by using the fan page as the employer.
Also, if you have multiple employers, you will notice only one shows
up on the front of your personal profile. This is usually the one with
the most recent start date that is also checked as a place you currently
work. Therefore, if you are trying to get one in particular up there,
you will have to make your start date for that one more recent that the
others.
7. Where Are My Tabs?
The last thing I’d like to talk about, since it is something that
people have gotten pretty used to, is the movement of the custom tabs
from the top of your fan page to the left side menu, underneath your fan
page’s profile picture.
So how do you promote these items now that they have moved from the top of the fold?
Promoting Custom Fan Page Content
Step 1. If you had a lot of custom tabs, you can prioritize them by clicking on the Edit link below them, and then dragging the ones you prefer under the Wall and Info items which cannot be moved.
Step 2. You can still have one tab that shows to anyone who isn’t a fan yet. Go to your Facebook fan page and click the Edit Page button. Under Manage Permissions, choose the tab you would like as the Default Landing Tab.

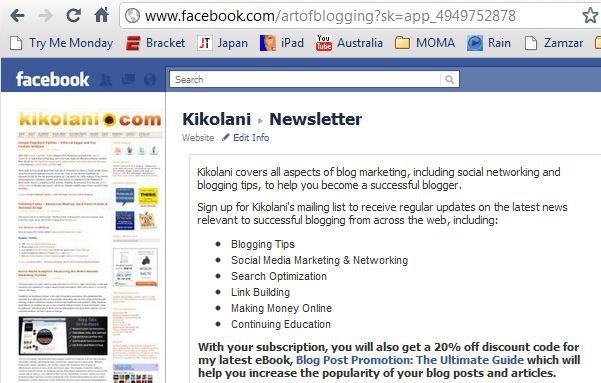
Step 3. If you want to drive visitors to a specific tab on
your fan page, you can link to it directly by clicking on the tab’s link
from your fan page and then copying the URL from your browser.
Also, as you may have also heard, Facebook is doing away with FBML,
so new custom content on your fan page must be created via iFrames and
HTML. The best guide I have seen so far on how to do this step by step
is How to Build a Facebook Landing Page with iFrames from SocialMouths. Highly recommended! So if you haven’t created your content yet, or need to update it from FBML, this is your guide!
We've to post this blog informative it amazing. I like this our content update details. I read that our all post it's useful...lively blog keep it up.
ReplyDeleteC and C++ Training Institute in chennai | C and C++ Training Institute in anna nagar | C and C++ Training Institute in omr | C and C++ Training Institute in porur | C and C++ Training Institute in tambaram | C and C++ Training Institute in velachery
Informative post indeed, I’ve being in and out reading posts regularly and I see alot of engaging people sharing things and majority of the shared information is very valuable and so, here’s my fine read.keep it up!!
ReplyDeleteandroid training in chennai
android online training in chennai
android training in bangalore
android training in hyderabad
android Training in coimbatore
android training
android online training